Node.js DevOps example
In this article, we’ll build a simple Node.js application that uses Express to respond to HTTP requests. In order to deploy this application to production, we’ll also configure a GitLab CI/CD pipeline so as to dockerize it and deploy its container to a Kubernetes cluster.
Prerequisites
This article assumes that the following environment is available to the reader:
- A development environment with Node.js installed.
- A GitLab instance with an available runner able to run the docker and kubectl commands.
- A production environment with a Kubernetes cluster reachable from the GitLab instance. For this, Microk8s is easy to get started with
- A Docker registry to push and pull containers to and from. Note that running your own registry might require Docker and Kubernetes configuration (guide for MicroK8s available here)
Node.js application
The application deployed in this guide is built using Node.js. It consists of a simple web server built using the Express package and responds Hello World! to HTTP requests. Here, it is assumed that Node.js is installed in the development environment. If this is not the case, a recommendation is to use NVM to install it.
Project creation
With Node.js installed, the application can be built. For this purpose, an empty Node.js project can be created as follows:
mkdir my_app
cd my_app
touch main.js
Next, we need to install Express, which can be done using the Node Package Manager, or NPM, which comes with Node.js. This requires the initialization of the project with NPM, which can be done using the initcommand:
npm install --save express
With that done, Express is installed using the following command:
npm install --save express
At this point, a new folder named node_modulesas well as files called package.json and package-lock.json should have appeared in the project’s directory. Those are here for dependencies management. node_modulesis effectively where packages are stored locally*.*
With this done, the project is now ready for actual development.
Example application
As an example application, we’ll use the hello world example from the Express documentation
With a text editor, open the empty file main.js in the my_app directory and paste the following content
// Import the express package
const express = require('express')

// Instanciate an express app
const app = express()

// Specify port on which the application will listen
const port = 3000

// Define a route
app.get('/', (req, res) => res.send('Hello World!'))

// Start listening on the defined port
app.listen(port, () => console.log(`Example app listening at http://0.0.0.0:${port}`))
This application can be executed using
node main.js
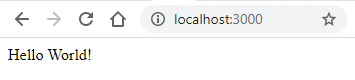
One can now point a browser to the ip of the server and specifying port 3000 to see the application responding with Hello World!. To quit the app, press Ctrl+C.
Dockerization configuration
Now that the application is working in the development environment, it is time to containerize it so that it can be shipped to the production environment.
The application is containerized using Docker, which simply requires a configuration file (called Dockerfile) to specify the containerization parameters. This section follows the NodeJS guide to application dockerization
A Dockerfile is used to create a container image, which servers as template for containers. For example, the official Python docker Image can be used to deploy containers with Python preinstalled.
Thus, to create an image of our application, create a file named Dockerfilein the root of the project with the following content:
# The image requires node so base it on an image that already has node installed
FROM node:12

# Create app directory
WORKDIR /usr/src/app

# Copy all files into the container
COPY . .

# Install dependencies
RUN npm install

# Open appropriate port
EXPOSE 3000

# Start the application
CMD [ "node", "main.js" ]
Note that additional commands might be required when working behind a corporate proxy.
To prevent the container from being too heavy, the node_modules directory is not needed inside of it. Instead, node_modules will be recreated automatically when npm install is run. To prevent the node_modules directory to be copied over, create a file named .dockerignore in the application directory with the following content:
node_modules
Kubernetes deployment configuration
With the Dockerfile created in the previous section, a container image of the application can be created and thus pushed to a container registry. This makes the application available for deployment in a Kubernetes cluster.
Deploying the application in a Kubernetes consists of creating two components: A deployment and a service. The deployment is basically the application itself while a service is a resource used to connect the application to its users, effectively by providing the deployment with a port with which it can communicate with the outside. Here, we will use port 31234 for our service.
The creation of the deployment and the service for our aplication is done by describing those in a manifest file and having Kubernetes read the content of that file. Thus, create a file names kubernetes.manifes.yml in the root of the project with the following content:
# This section will create a deployment in the Kubernetes cluster
apiVersion: apps/v1
kind: Deployment
metadata:
  name: my-application
spec:
  replicas: 1 # Specifies how many instances of the app will run in parallel for load balancing
  selector:
    matchLabels:
      app: my-application
  template:
    metadata:
      labels:
        app: my-application
    spec:
      containers:
      - name: my-application
        image: my-registry/my-application:latest # Where the image has been pushed
        imagePullPolicy: Always # Ensures that k8s pulls a new image on restart
        ports:
        - containerPort: 3000 # Must match the port of the application and that exposed in the container
---
# This section will create a service in the Kubernetes cluster
# so that the deployment can be accessed from the outside
apiVersion: v1
kind: Service
metadata:
  name: my-application
spec:
  ports:
  - port: 3000 # Must match the container port
    nodePort: 31234 # Port of the app from outside the cluster. Service ports must be between 30000 and 32000
  selector:
    app: my-application
  type: NodePort
GitLab CI/CD configuration
The project now has a working source code as well as the configuration needed to be containerized and deployed to the Kubernetes cluster. Although the containerization and deployment can be done manually, it is more convenient to have GitLab perform those steps automatically. This is especially true if the tools needed to perform those steps are not installed in the development environment.
To have GitLab take care of the containerization and deployment, simply create a file named .gitlab-ci.yml that contains the necessary commands for each step as yaml arrays:
stages:
  - containerization
  - deploy

containerization:
  stage: containerization # must match the stage name declared above
  script:
    # Build the container image
    - docker build -t my-registry/my-application .
    # Push the container image to the registry
    - docker push my-registry/my-application
    # Cleanup by removing the local image
    - docker image rm my-registry/my-application

deployment:
  stage: deploy # must match the stage name declared above
  script:
    # create/update the kubernetes resources
    - envsubst < kubernetes_manifest.yml | kubectl apply -f -
    # Restart the deployment so as to pull the latest version of the container image
    - kubectl rollout restart deployment/my-application
  environment:
    name: production
GitLab project preparation
Project creation
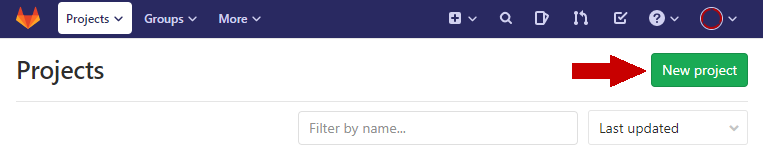
The local content of the project is ready for the deployment of the application. Now, a remote repository needs to be created for the project in GitLab. This can be done simply by clicking the New project button and then giving a name to the project.
Once created, GitLab provides an URL that can be used to push code to the repository.
Kubernetes Integration
Now that the project has been created in GitLab, it must be configured so as to connect to the desired Kubernetes cluster. Ideally, the project should be created in a group that already has a Kubernetes cluster integrated, but if it is not the case, Kubernetes clusters can be integrated at project level.
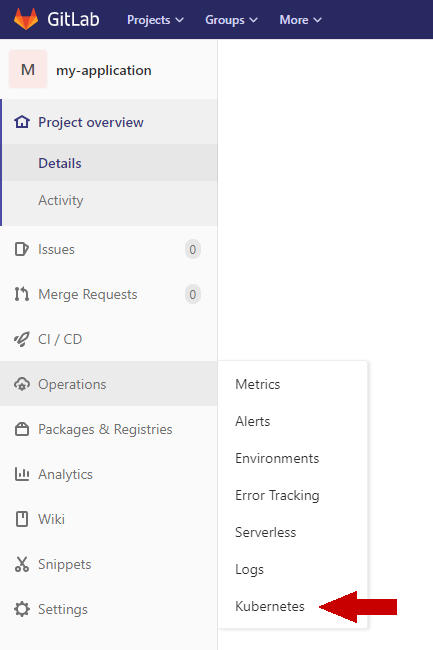
To do so, go to the Operations menu of the project in GitLab and click Kubernetes.
This leads to a page allowing the user to configure details of the Kubernetes cluster integration. The Gitlab documentation provides a complete guide on how to do so.
Pushing the project to GitLab using Git
With the remote repository created, the local content can pushed using Git. To do so, the project direcotry must be inisialized so as to be used with git, which can be done as so
git init
The remote repository can then be registered using the git remote add command:
git remote add gitlab http://<gitlab url>/<my-user>/my-application
The node_modules directory can be quite heavy so it is not needed to upload it to GitLab. Users can download the modules by running npm install if needed. To prevent it to be uploaded, file named .gitignore in the project’s root directory and have the following as content:
node_modules
With everything in place, the code can be staged, commited and pushed
git add .
git commit -m "Deploying to k8s"
git push gitlab master
Now that the code has been pushed to GitLab, the CI pipeline takes care of the containerization and deployment of the application. If everything succeeds, the project page should greet users with a green check mark next to the commit number.
With such a pipeline in place, the application running in Kubernetes will be updated automatically each time the developer pushes code on the master branch of the project, which greatly reduces the hurdles of deployment.