Distributing a Helm chart on Artifact Hub
Building applications in a microservice architecture has become more and more popular recently. With this design pattern, an application is composed of multiple services that run independently and generally share data across network protocols.
An example of such application could be an e-commerce website where users, product inventory or orders are all managed by their own respective independent service.
Since all services are independent, deploying an application to Kubernetes involves the deployment of a large amount of resources such as deployments, services, PVCs, which can quickly become tedious if done by hand. To solve this problem, applications can be packaged using Helm, which takes care of deploying all the necessary resources. An application packaged with Helm is called a chart. Similarly to how Docker containers are spawned from container images, in helm, applications are spawned from Helm Charts.
To facilitate the the sharing of such charts, one can use the equivalent to Docker Hub for Helm charts, Artifact Hub. This article goes through the steps necessary to publish one’s own helm chart on the platform.
Prerequisite: Helm install
To use Helm, we must first start by installing it on our system. This can be done by following the official documentation. Once installed, we can proceed to the next step and create a Helm chart.
Creating a Helm Chart
Helm facilitates the deployment of an application by taking care of the creation of all its necessary Kubernetes objects such as deployments, services, PVCs etc. An application packaged with Helm is called a chart. Such chart can be created using the helm create command;
helm3 create my-helm-chart
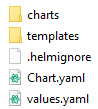
This should create a project with the following content:
Adding Kubernetes manifests
Simply put, Helm applies all the Kubernetes manifests that are in the templates folder whenever a chart is installed. Additionally, Helm offers many tools and options such as templating but we will ignore those for the moment in order to keep this guide concise. For this example, let’s delete everything from the templates folder and start from scratch. The values.yaml file is not needed at the moment either and can also be deleted.
Let’s assume that we want to deploy an application simply comprised of an NGINX container, exposed via a NodePort. For such an application, here is what a Kubernetes manifest would look like:
apiVersion: apps/v1
kind: Deployment
metadata:
  name: nginx
spec:
  replicas: 1
  selector:
    matchLabels:
      app: nginx
  template:
    metadata:
      labels:
        app: nginx
    spec:
      containers:
      - name: nginx
        image: nginx
        ports:
        - containerPort: 80
---
apiVersion: v1
kind: Service
metadata:
  name: nginx
spec:
  type: NodePort
  selector:
    app: nginx
  ports:
  - port: 80
    nodePort: 30000
Thus, let’s go ahead and create a file called nginx.yaml with this content into the templates folder of our helm project.
Installing the chart locally for testing
With our manifest(s) in the templates folder, we can have Helm install our application and thus apply all of our manifests into our Kubernetes cluster. This is done using the following command:
helm3 install my-helm-app .
The command requires two parameters. Firstly, we have to provide a name for our application so that we can uninstall our update it in the future. Secondly, we specify where the helm chart is. In our case, the chart is in the current directory. The output of the command should look as follows:
NAME: my-helm-app
LAST DEPLOYED: Tue Nov 30 12:44:08 2021
NAMESPACE: default
STATUS: deployed
REVISION: 1
TEST SUITE: None
We can then use the kubectl get deployments command to check that our application is deployed correctly.
NAME    READY   UP-TO-DATE   AVAILABLE   AGE
nginx   1/1     1            1           73s
With our chart working as expected, it is now time to publish it on Artifact Hub.
Packaging the Helm chart
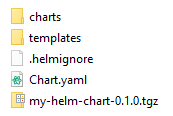
In order to be shared on Artifact Hub, the helm chart must be packaged. This can be done using the Helm package command:
helm3 package .
This should generate a tgz archive in the chart directory.
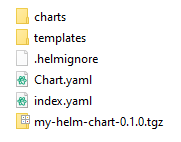
Creating an index file for the chart
Artifact Hub requires an index.yml file to be present in the chart’s directory. This file contains information about the chart and is created automatically by running the following command:
helm3 repo index .
This should generate the index file for the chart in the working directory.
A GitHub repository with pages to host the chart
Our chart directory now contains pretty much everything it needs in order to be distributed. Although Artifact Hub is a distribution service for resources like Helm charts, it is not a file storage service. Consequently, we need to find some other place to store our chart online. For this purpose, we can leverage GitHub pages.
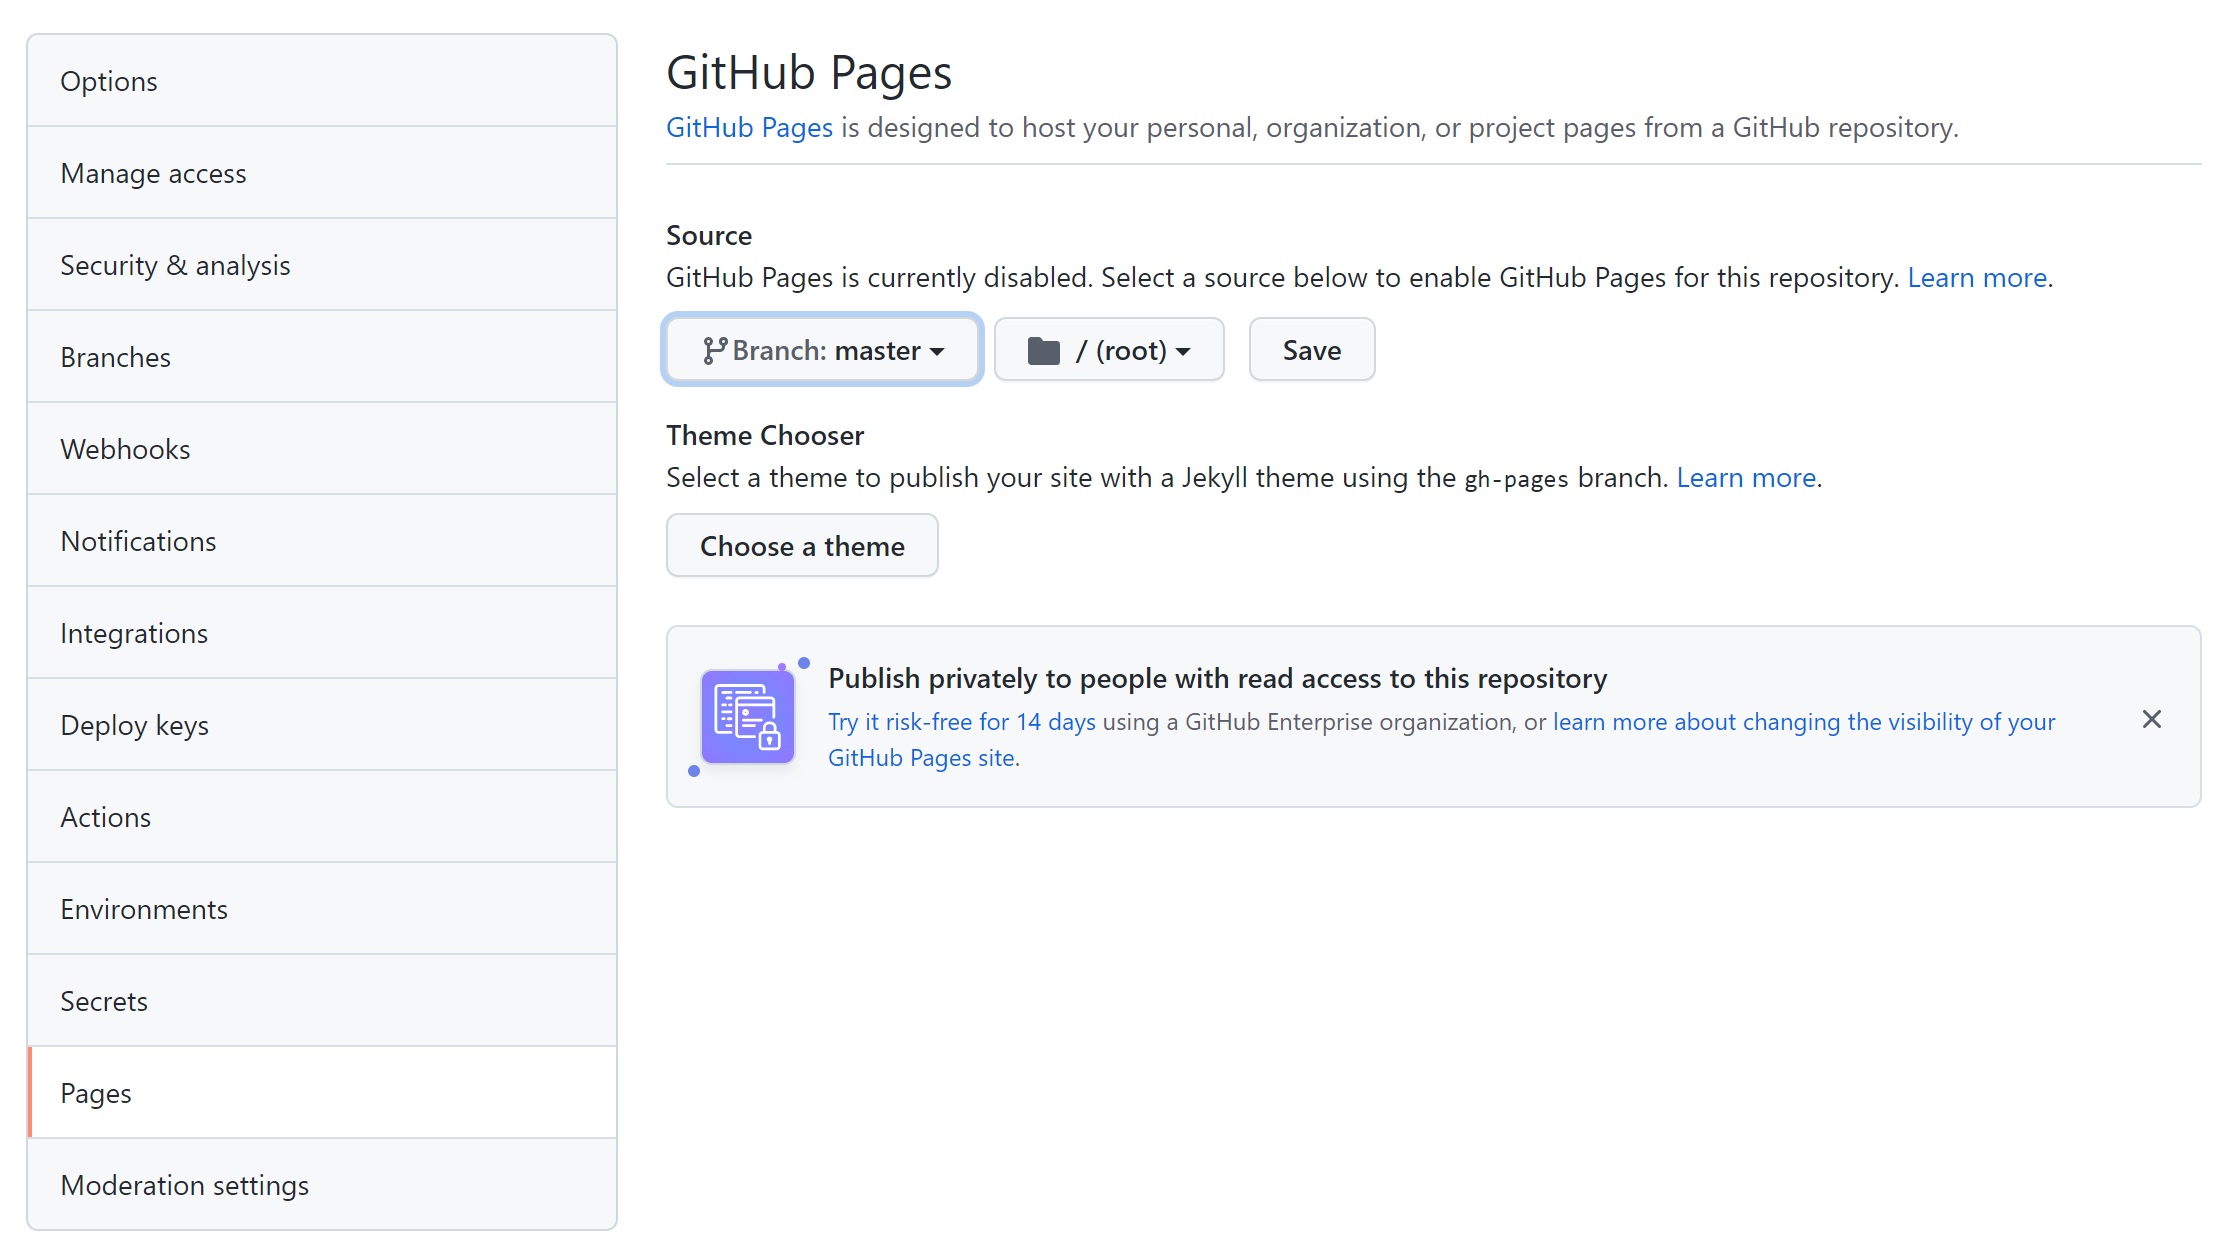
Let’s go ahead and create a GitHub repository for our chart and upload our files there using git. With our files uploaded on the repository, we can configure GitHub Pages for the latter so that the files get served via HTTP. This can be done by going into settings > pages and selecting which branch to serve (most likely master or main).
With this done, our Chart files are now accessible as static assets from an URL in the form:
https://USERNAME.github.io/GITHUB_REPO_NAME/
Adding a repository on Artifact Hub
Now that our chart has its files properly being served by GitHub pages, we can finally register it on Artifact Hub. Let’s start by creating an Artifact Hub account if not already done and log in. From there, let’s head into the control panel and click the add button. We are presented with a form requiring information about our chart:
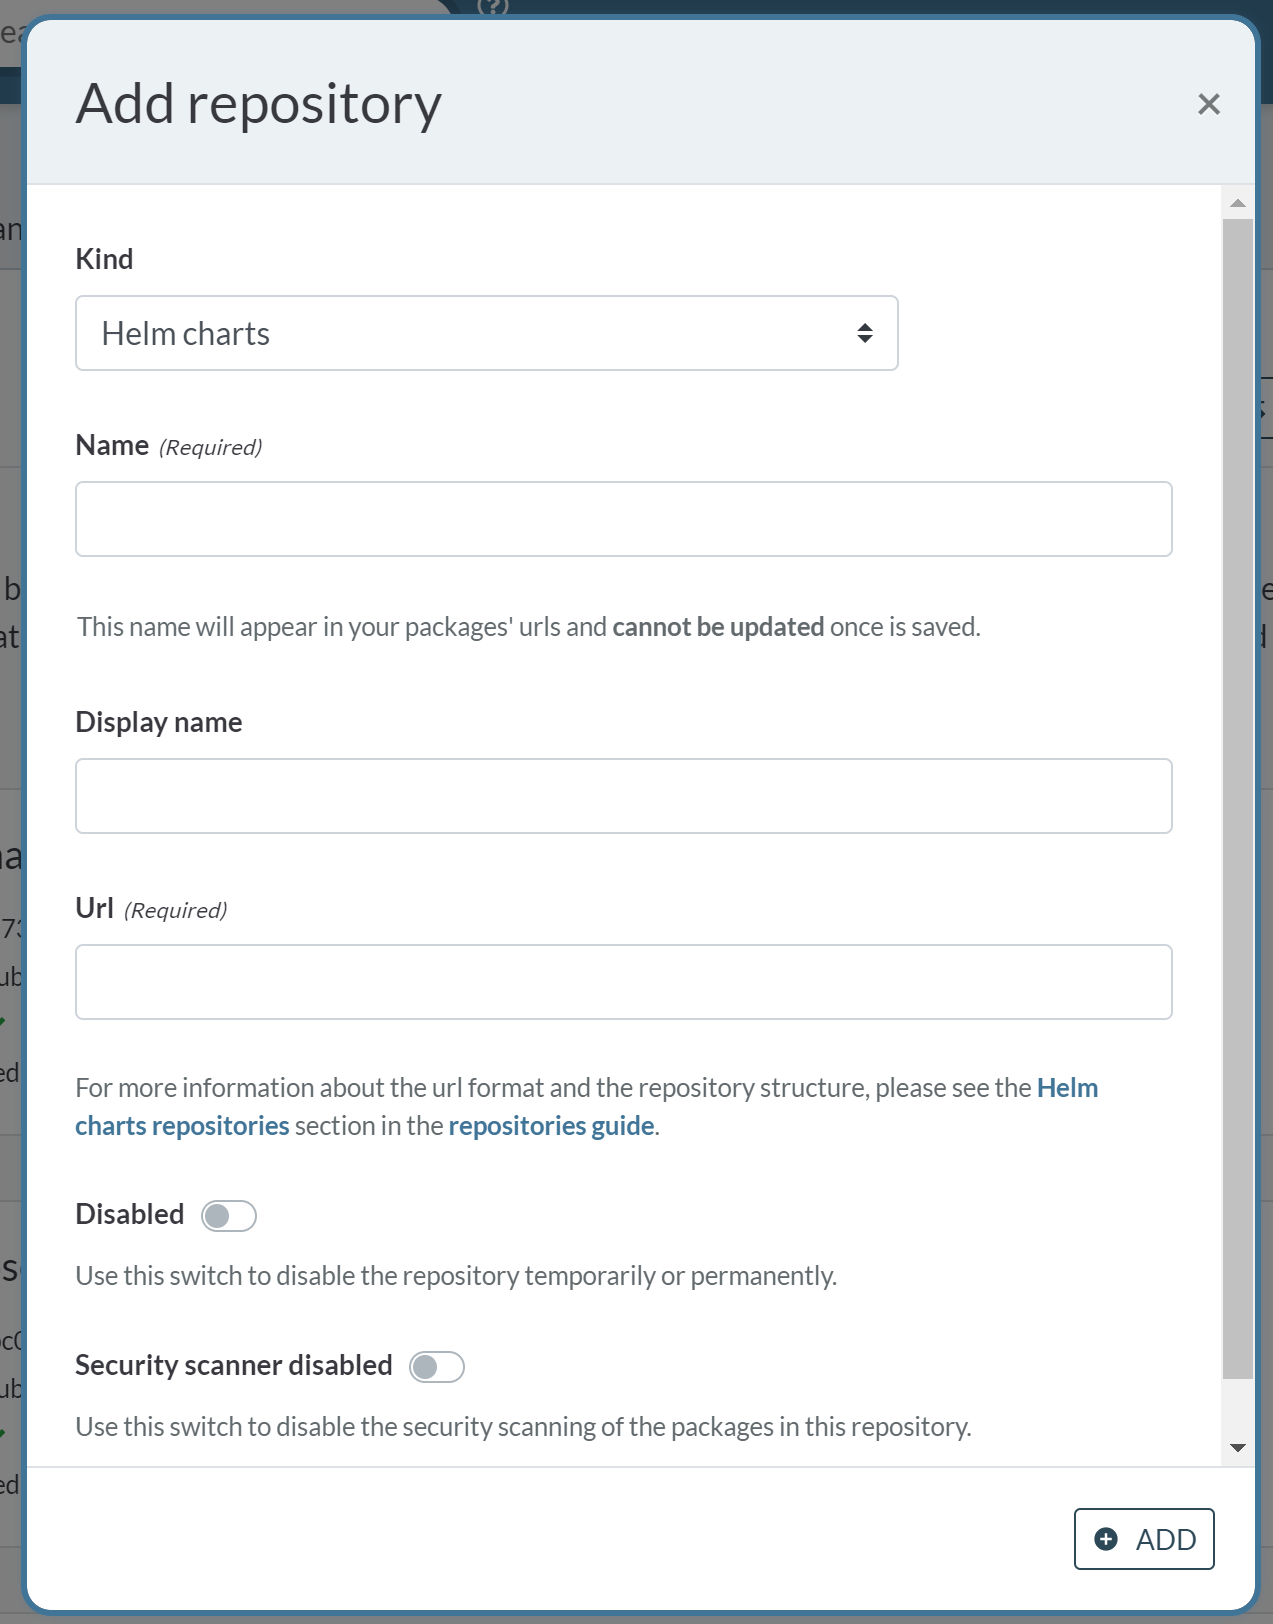
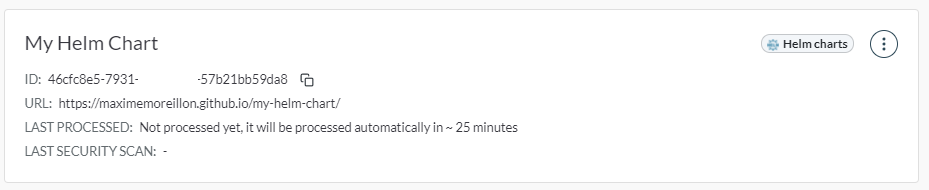
After giving a name to our chart and providing the URL pointing to our files on the GitHub pages of the repository we can go ahead and click add. Our chart should now be properly registered on Artifact Hub.
Publisher verification
The last step of the chart’s publication is the verification of the publisher. This can be achieved by creating a file named artifacthub-repo.ymlalong the other project files with a content in the form of the following:
repositoryID: YOUR_REPOSITORY_ID
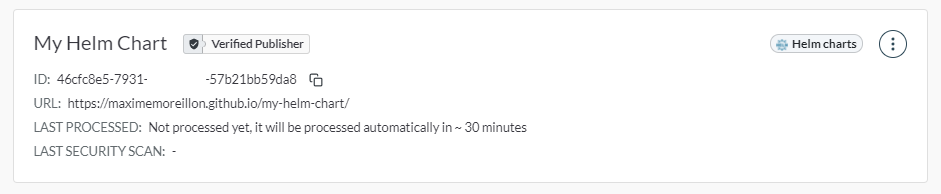
Here, we need to replace YOUR_REPOSITORY_ID with the ID provided on the repository page of Artifact Hub. Once done, let’s push this new file to GitHub and wait for Artifact Hub to notice it. After a few minutes, the Helm chart should have received a publisher verified badge and can now be shared with Artifact Hub users.
Installing the Helm chart from Artifact Hub
After those numerous steps, our Helm chart is finally published on Artifact Hub. Users can then go ahead and install it from there. This can be done with the following commands:
helm3 repo add my-helm-chart REPO_URL
helm install my-helm-app my-helm-chart/my-helm-chart --version 0.1.0
where REPO_URL is the URL of the GitHub pages of the helm Chart.
Conclusion
Users looking for applications to install using Helm are likely to turn to Artifact Hub. As such, having an application available there makes distribution convenient for both its developers and end users. On the developers side, new versions of the application can be pushed easily using git while end users can install and upgrade it with only a few commands.